Resources · Guide 13 · TRIP
Turn a hand-drawn map into a travel itinerary
Sketch your trip on paper: a coastline, a line, some crosses and a few notes. Claude reads the stops, checks the route, estimates distance and budget, and builds a map with the route, pins, day-by-day cards, a budget and a 3D fly-through. It is all code: no image or video model.
What you'll make
- A route map that draws itself on, with the total distance
- Pins for every stop and a card for each day
- A budget split into stays, food, fuel and activities (estimates)
- A 3D fly-through that tilts the map and travels along the route
- Optionally, the same trip on a real OpenStreetMap map
What you need
Claude
Reads your sketch, checks the route, estimates distances and budget, and builds the itinerary as a web page
A maps app
To check the distances and driving times Claude estimates
Leaflet + OpenStreetMap (optional)
A free map library and map tiles for a version on a real map
Step by step
7 steps-
Sketch the trip
Draw the rough shape of the coast or border, a line for your route, and a cross with a name for each stop. Add what you know: a guess at the distance, a few words per day ("d2 nazaré waves"), rough costs.
It does not need to be accurate. The reel's sketch was a wobbly coastline, "sea" on one side and "~560km?" next to the line. Photograph each page straight on.
-
Have Claude read it and check the route
Claude lists the stops in the order you drew them and the numbers you wrote, then checks the order makes sense on a real map. If you zig-zag back on yourself, it should suggest a better order and say why.
Correct anything it misread before going on.
Ask ClaudeHere are photos of my hand-drawn trip map. List the stops in the order I drew them, any numbers I wrote (distances, prices), and anything you could not read, marked (?). Then tell me if the order makes sense geographically, and if not, suggest a better one and say why. Flag any leg that looks too long for one day.
-
Get the days, distance and budget
Ask for one short line per day and estimates for the driving and the money. Every number here is an estimate: Claude does not see live prices or traffic. Check distances and times in a maps app and prices on booking sites.
In the reel the trip came out at about 560 km over five days, with a budget of €1,240 for two: stays €620, food €310, fuel and tolls €140, activities €170. Straight-line, those five stops are 477 km apart, and roads are always longer, so the driving distance is worth checking.
Ask ClaudeGive me one line per day: the stop, one emoji, and the one thing it is for in under five words (like "Big-wave cliffs"). Estimate the driving distance and time for each leg and the total. Then estimate a budget for [2] people: stays, food, fuel and tolls, activities, as round numbers in the local currency, with the total and per day. Say what each figure assumes and label every number as an estimate I should check.
-
Have Claude build the itinerary
Ask for one page with five views, like the reel: the route drawing on with the distance counting up, pins popping in, a card per day with the map zooming to each stop, a budget card with bars, and a fly-through.
The reel's map is a clean, stylised drawing of your sketch, not a real map. That keeps it simple and works offline. If you downloaded the skill, Claude starts from its template.
Ask ClaudeBuild my itinerary as one self-contained HTML page at 9:16 (573 x 1019 px) with five views I can step through: 1) a stylised map (sea, land shaped like my sketch, a few roads) with the route drawing itself on and a card counting up the total km and days, 2) pins with emoji labels popping in one by one, 3) day cards at the bottom while the map zooms to each stop, 4) a budget card with the total counting up and a bar per item, 5) a fly-through. Label distances and the budget as estimates. Add a key to hide the buttons so I can screen-record it.
-
Add the 3D fly-through
The fly-through is the flat map tilted back in 3D with CSS, while the camera slides along the route from stop to stop and the pins stand up off the map. It is the same drawing, not a 3D model of the terrain.
In the reel the map tilts to 58 degrees in about half a second, turns slightly as it goes, and shows the name of the nearest stop at the top.
Ask ClaudeFor the fly-through view: give the stage a CSS perspective of 900 px, tilt the map back to 58 degrees over the first half second, scale it 1.6x, and move it so the camera travels smoothly along the route from the first stop to the last, easing in and out. Rotate the pins back up so they stand on the map. Show the nearest stop's emoji and name at the top over a soft sky gradient.
-
Optional: put it on a real map
For real geography, ask for a second version on OpenStreetMap using the free Leaflet library. It loads the library and map tiles from the internet, and the lines between stops are straight, not roads.
If the map stays grey when you double-click the file, open it through a small local web server instead (in a terminal in that folder: python3 -m http.server, then open localhost:8000). OpenStreetMap's free tiles are for light use and need the attribution kept on the map.
Ask ClaudeMake a second version on a real map with Leaflet and OpenStreetMap tiles: a pin for each stop with its day and name, a dashed line between stops, the straight-line distance for each leg, the day list and the budget underneath, and a button that flies from stop to stop. Keep the OpenStreetMap attribution.
-
Record it
Open the page full screen, hide the buttons and screen-record it as it plays through the five views. Put your sketches beside it and you have the reel. If you code, the views port to Remotion for a frame-perfect MP4, which is how the reel was rendered.
The prompts behind the reel
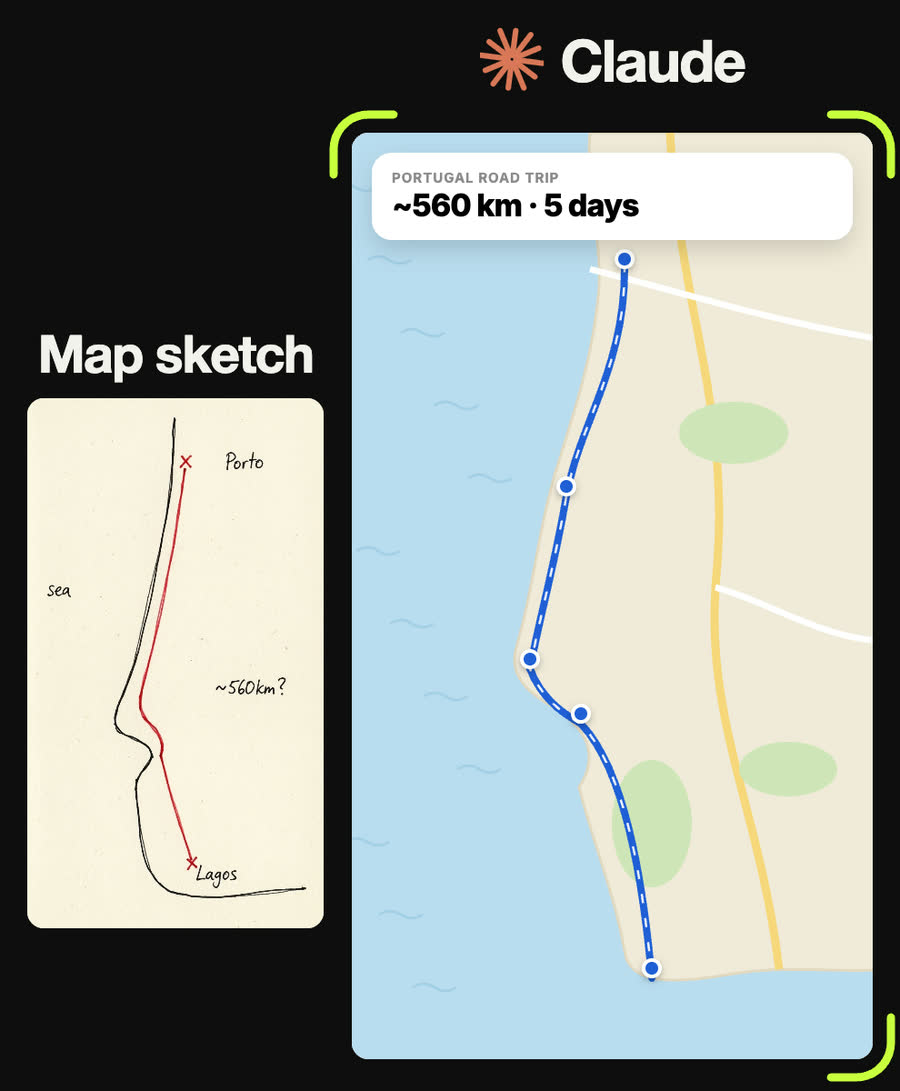
Draw the route on over frames 4 to 60 with an ease-in-out, and at the same time count the top card up to "PORTUGAL ROAD TRIP · ~560 km · 5 days". Show the first pin when the line starts and the rest when it finishes.
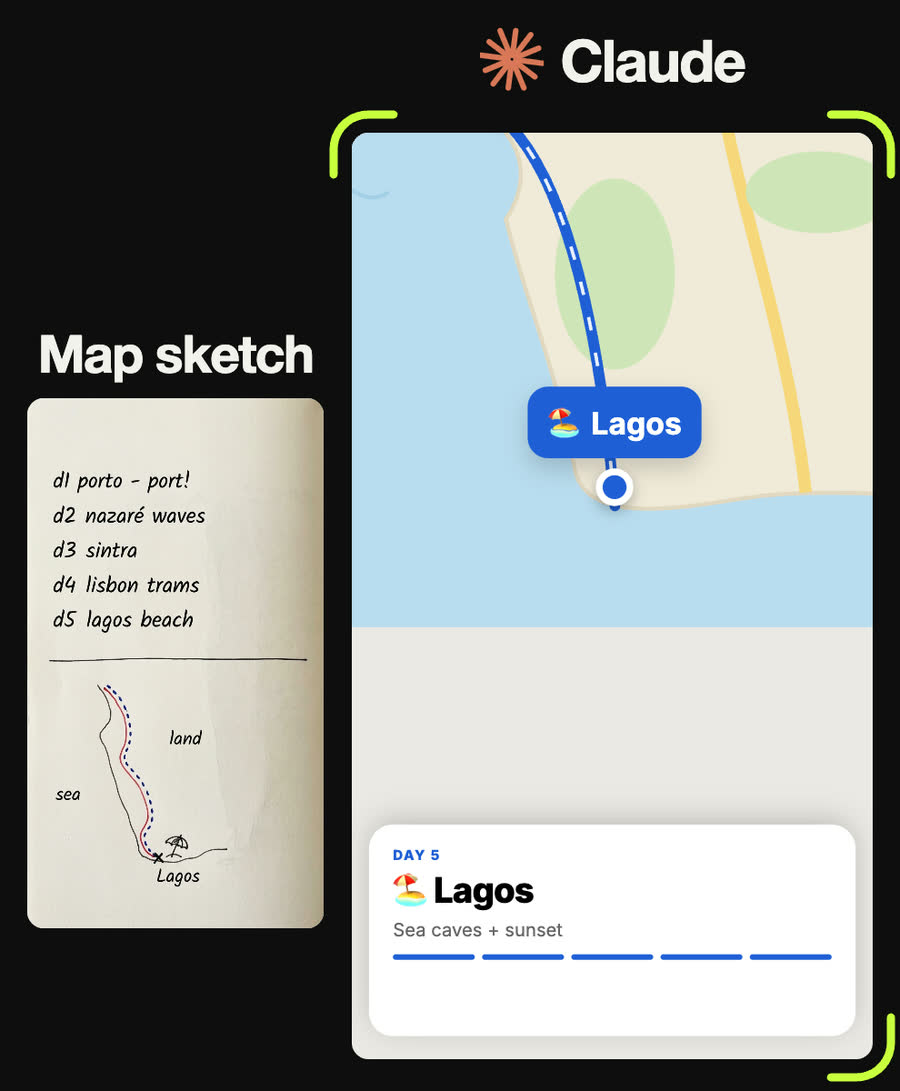
Make the day cards read: Day 1 🍷 Porto, Port lodges + Ribeira. Day 2 🌊 Nazaré, Big-wave cliffs. Day 3 🏰 Sintra, Palaces in the hills. Day 4 🚋 Lisbon, Trams + pastéis. Day 5 🏖️ Lagos, Sea caves + sunset. Zoom the map to 1.5x on each stop and add a five-step progress bar.
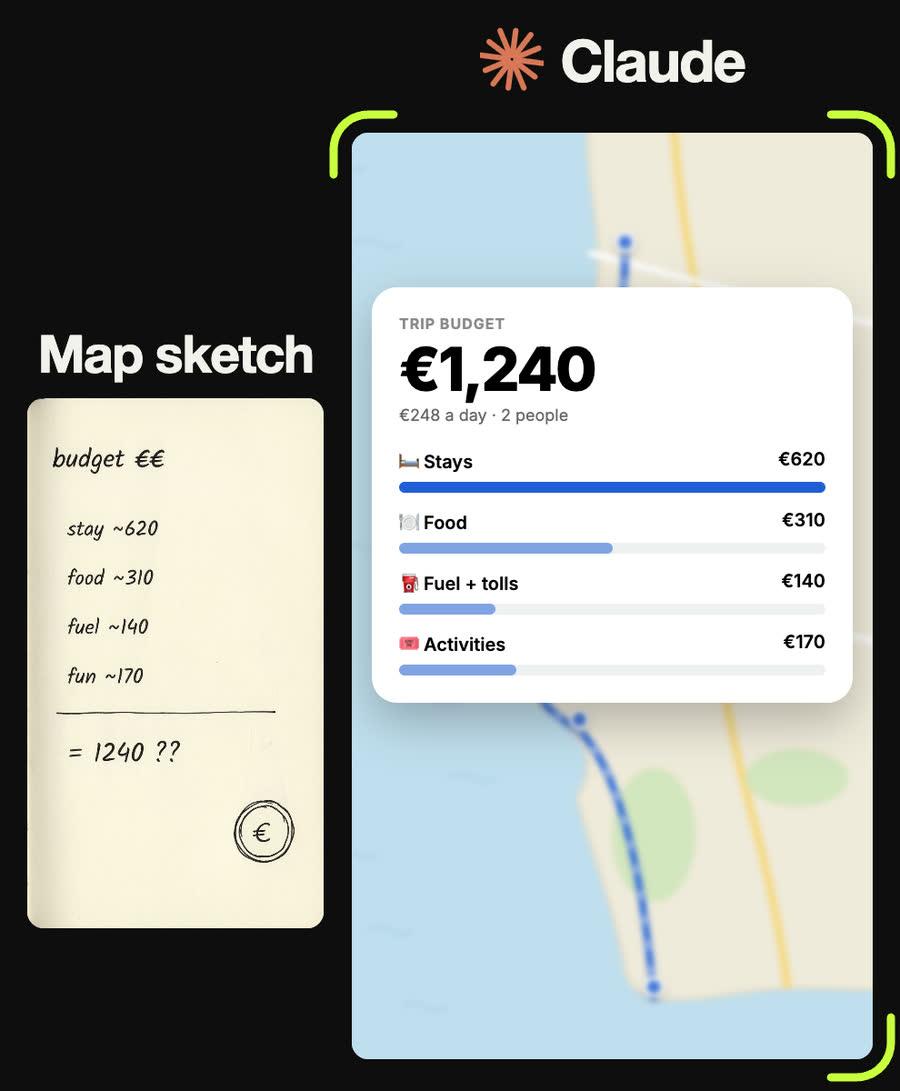
Budget card over the blurred map: "TRIP BUDGET · ESTIMATE", the total counting up to €1,240, "€248 a day · 2 people", then a row and a bar for Stays €620, Food €310, Fuel + tolls €140 and Activities €170, the largest bar full width.
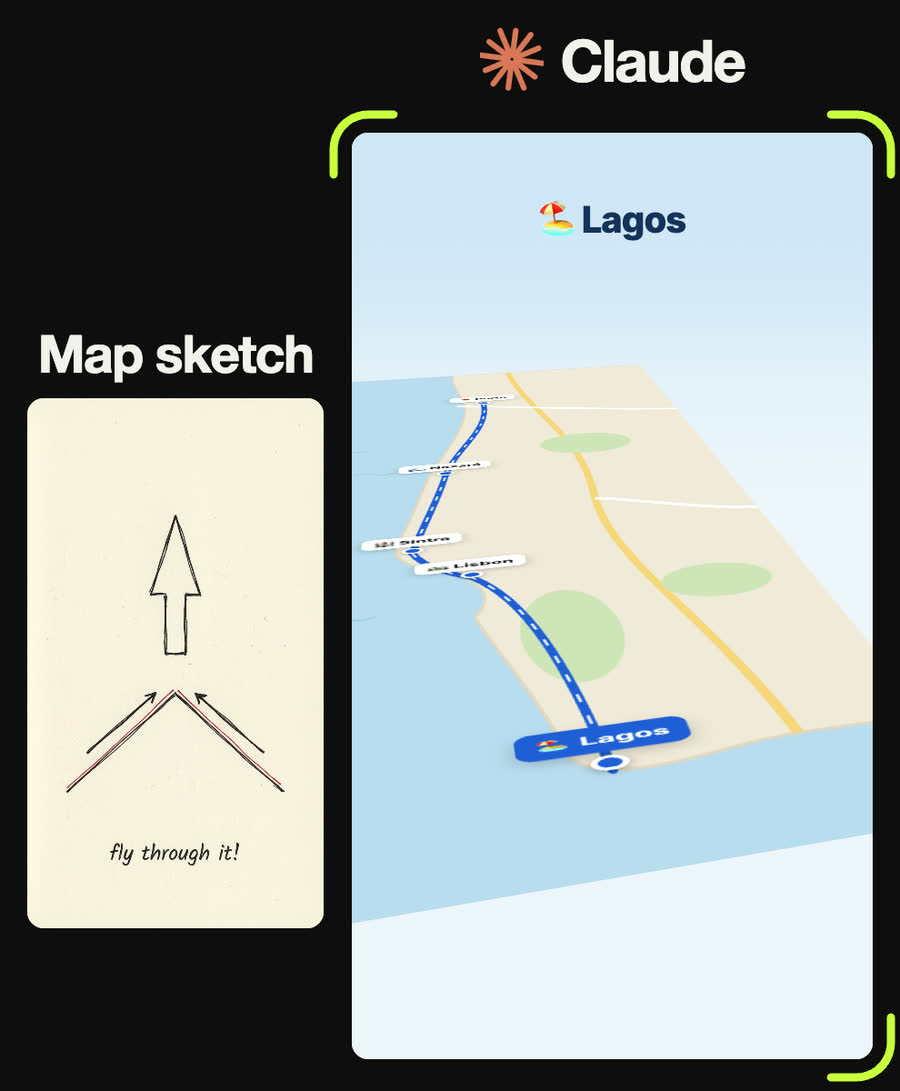
Tilt the map back to 58 degrees with CSS perspective 900 px, scale it 1.6x, rotate it slowly by 12 degrees, and glide the camera along the route from Porto to Lagos with the pins standing up and the nearest stop's name at the top.
Tips
- Every distance, time and price Claude gives is an estimate. Check them in a maps app and on booking sites before you book anything.
- Ask for the straight-line distance too. Roads are always longer, so it tells you the minimum.
- Keep stops that are close together slightly apart on the stylised map so their labels do not overlap.
- One short reason per day (under five words) reads far better on a card than a paragraph.
- The stylised map works offline and is easy to restyle; the real-map version needs an internet connection.
Claude skill
Do it in one go with the map-sketch-to-itinerary skill
Give Claude a photo of your trip sketch and it reads the stops, checks the order, estimates distances and budget (clearly labelled), and fills in the reel's five-view itinerary template, with a real-map version on OpenStreetMap as an option.
Download map-sketch-to-itinerary.zipIn Claude (web or desktop app)
- Open Settings → Capabilities and make sure code execution is on.
- Under Skills, choose Upload skill and pick the zip.
- Start a chat, attach a photo of your input, and ask for the result. Claude uses the skill on its own.
In Claude Code
- Unzip it into
~/.claude/skills/(or.claude/skills/in a project). - Restart Claude Code and ask for the result. The skill loads when it fits.